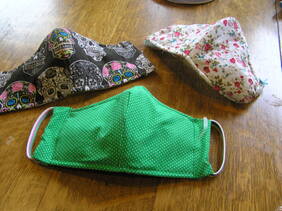
Caution this is a homemade, DIY project that may not hold up to rigorous testing with proper equipment. I named this product for my Grandfather Charles A Parker who could make anything out of the stuff in his shop.
In last week’s blog (See below) I talked about my reasoning in wanting to make face masks. I also mentioned that I found the liner fabric in garage. My polypropylene (Pp) comes from a roll of weed barrier and the polyethylene (Pe) is floating row cover. This week, I felt ready to begin my project.
In last week’s blog (See below) I talked about my reasoning in wanting to make face masks. I also mentioned that I found the liner fabric in garage. My polypropylene (Pp) comes from a roll of weed barrier and the polyethylene (Pe) is floating row cover. This week, I felt ready to begin my project.
Testing
After machine washing and drying all the fabrics I intended to use I decided to test my design.
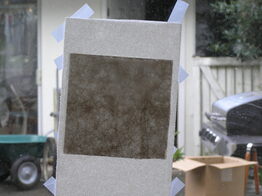
I taped two layers of paper towel to the patio door then taped samples of my polypropylene (Pp) and polyethylene (Pe) to the paper towel. Using a spray bottle from the kitchen I sprayed them twice with water, then removed the filter. Back lighting from the window allowed me to see the water spatters. I discovered that I needed 4 layers of my Pp to prevent any visible water spatters from hitting the paper towel. I tried the spray-bottle test without the polyethylene, but didn’t like how wet the Pp layer got. I decided to use the polyethylene (Pe) for moisture control.
After machine washing and drying all the fabrics I intended to use I decided to test my design.
I taped two layers of paper towel to the patio door then taped samples of my polypropylene (Pp) and polyethylene (Pe) to the paper towel. Using a spray bottle from the kitchen I sprayed them twice with water, then removed the filter. Back lighting from the window allowed me to see the water spatters. I discovered that I needed 4 layers of my Pp to prevent any visible water spatters from hitting the paper towel. I tried the spray-bottle test without the polyethylene, but didn’t like how wet the Pp layer got. I decided to use the polyethylene (Pe) for moisture control.
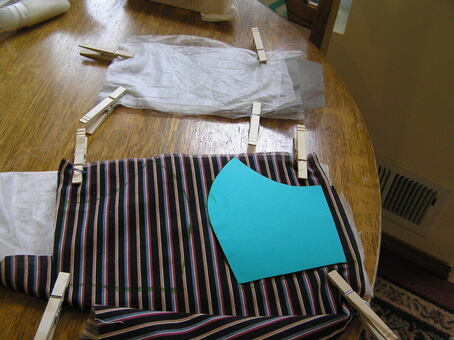 Filter and lining fabrics clipped together so I can treat them as one piece the Flining*
 Cutting
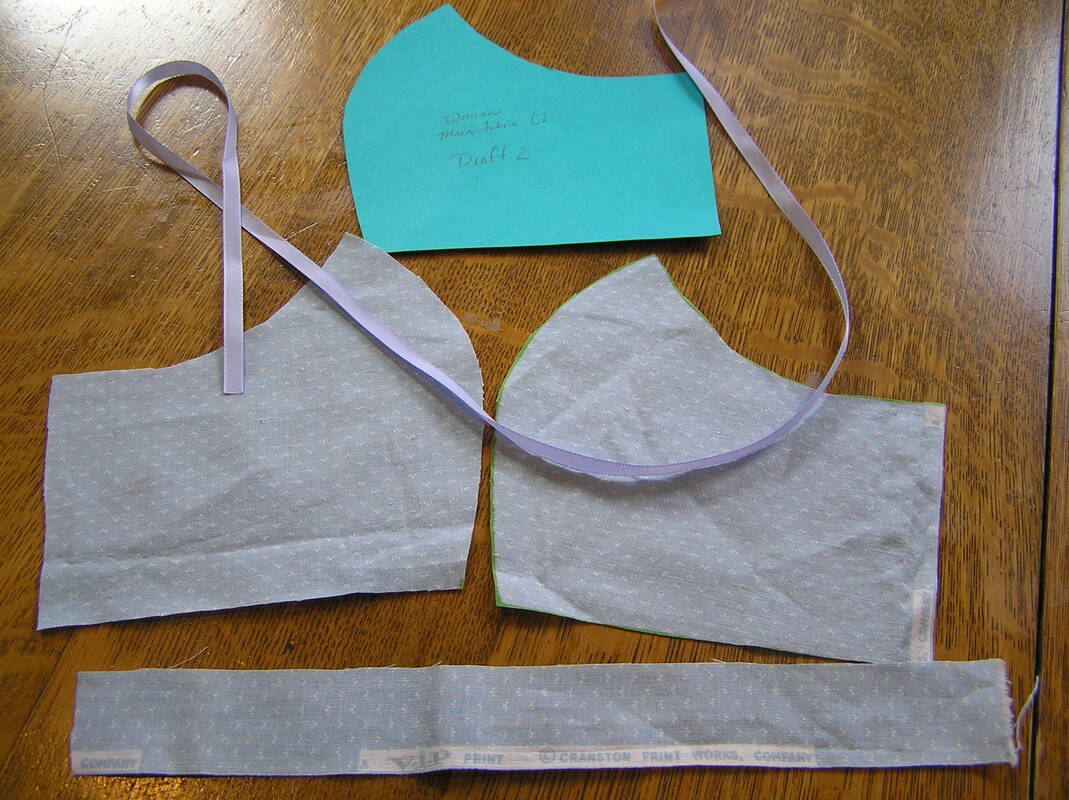
The lining and filter - The polyethylene (Pe) is lightweight and a bit unruly to work with. The polypropylene (Pp) is a bit stiff. I decided to work with the filter layers and lining layer as all one piece making a Flining* (filter and lining as one piece). I worked with just enough fabric to make both halves of one Flining* at a time— About 7” X 11”.
To control the materials before cutting, I stacked them cotton right side out on the bottom, 2 layers polyethylene (Pe), 4 layers Pp, and 2 layers Pe. I used clothes pins to hold them together until I got all the layers even then I pinned them. I used a marking pen to draw around my pattern directly on the Pe. Before cutting, I machine basted around the outside of my cutting line then finally inside my cutting line along the seam allowance. Working with the filter pieces and lining as all one piece made construction easier.
The outside layer is a larger piece, single layer.
Insane Note. Why in the sixty-five years I’ve been sewing has it never ever occurred to me to draw the cutting lines directly on the fabric from a card-stock pattern that doesn’t shift and fly all over the place?
The outside pieces with their pattern.
Assembly
Assembly went fairly smoothly once I remembered to cut both a right and left side for the filter. I quickly learned that two right sides don’t work. I was trying to save fabric and turned one side of the filter the wrong way to fit it closer on the fabric before cutting. We’ve all made that mistake, but you’d think I’d learn.
The left and right sides of the flinging* are stitched along the curved edge. The outside layer is stitched the same.
I stitched the outside to the flining* right-sides together at the top, turned the mask right side out and pressed, pulling the outside over the filter. Next, I inserted a moldable plastic floral wire along the full length of the top and top-stitched it in place next to the seam allowance. Some people use twist ties or paper clips for shaping around the nose.
I liked using a seam binding at the bottom of the mask. The outside and Flining layers can be stitched right sides together along the bottom, then the mask turned right side out. The sides of the cover are cut long enough to fold back to make a casing for the elastic ear piece.
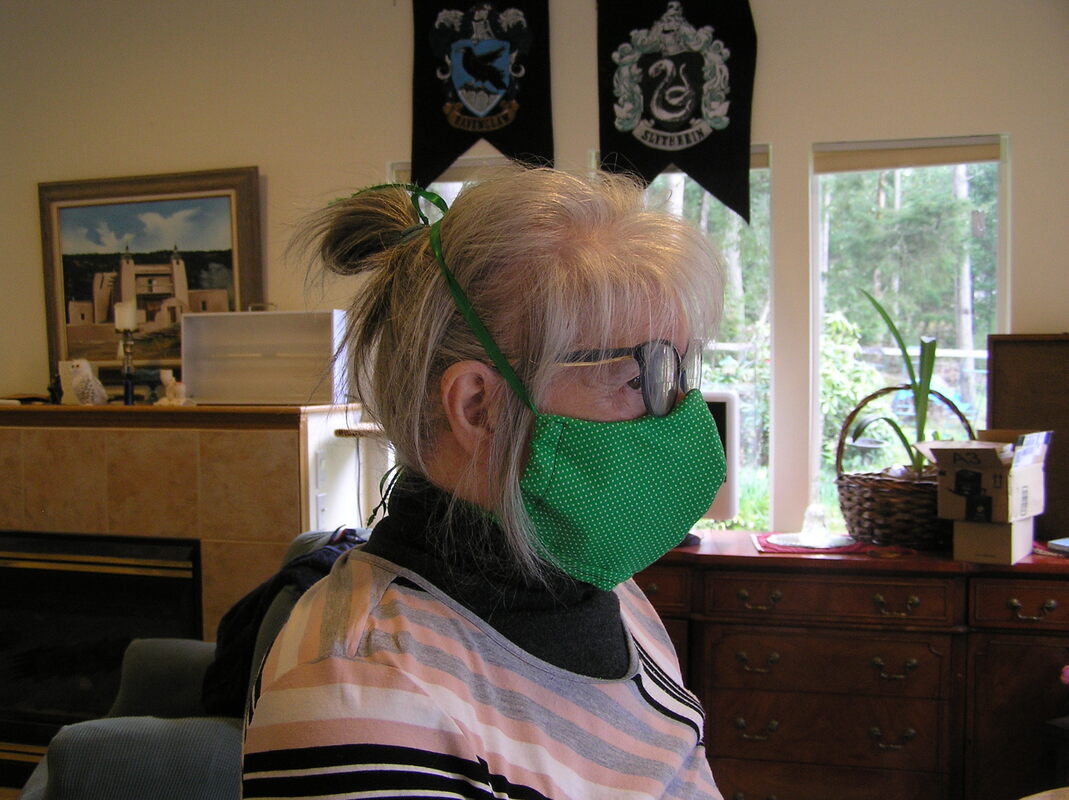
For my first products, I used elastic bands that fit around the ears. That worked and is a common way to hold a mask on. I, however, wear glasses and behind-the-ear hearing aids. Folks, it was getting a little crowded back there. I decided to try ties.
Assembly went fairly smoothly once I remembered to cut both a right and left side for the filter. I quickly learned that two right sides don’t work. I was trying to save fabric and turned one side of the filter the wrong way to fit it closer on the fabric before cutting. We’ve all made that mistake, but you’d think I’d learn.
The left and right sides of the flinging* are stitched along the curved edge. The outside layer is stitched the same.
I stitched the outside to the flining* right-sides together at the top, turned the mask right side out and pressed, pulling the outside over the filter. Next, I inserted a moldable plastic floral wire along the full length of the top and top-stitched it in place next to the seam allowance. Some people use twist ties or paper clips for shaping around the nose.
I liked using a seam binding at the bottom of the mask. The outside and Flining layers can be stitched right sides together along the bottom, then the mask turned right side out. The sides of the cover are cut long enough to fold back to make a casing for the elastic ear piece.
For my first products, I used elastic bands that fit around the ears. That worked and is a common way to hold a mask on. I, however, wear glasses and behind-the-ear hearing aids. Folks, it was getting a little crowded back there. I decided to try ties.
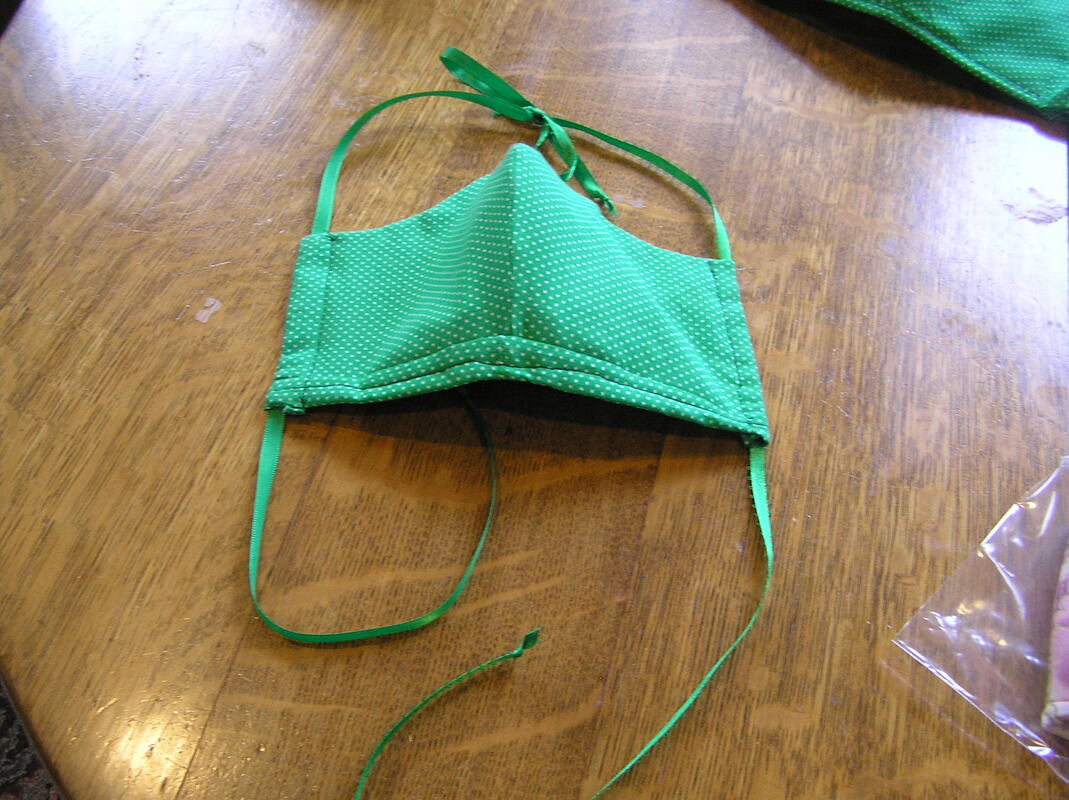
Mask with ties
Fitting
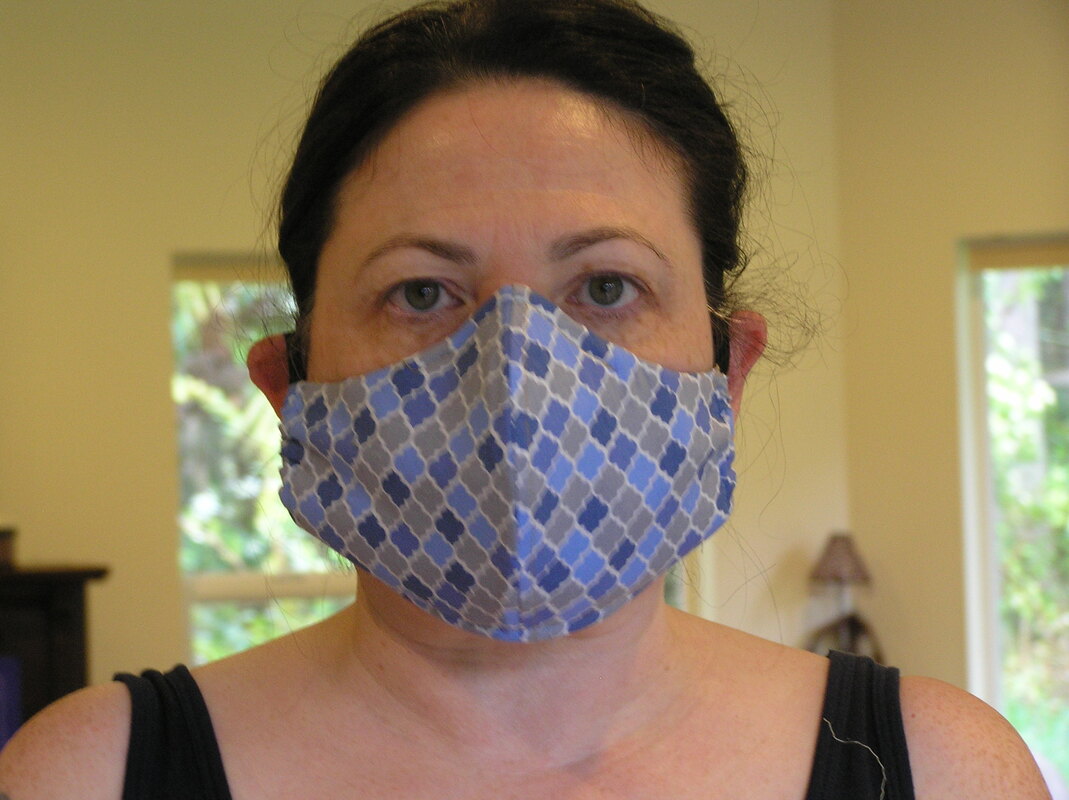
At this point, attaching the face mask is going to be a matter of preference. Some people are going to like the elastic. Some people are allergic to the latex in the elastic. My favorite tie consisted of a 30” piece of ribbon threaded through the casing for the elastic. Tack the tie down through the casing to keep it from slipping out of the casing. I tied this at the top-back of my head, then pulled the bottom of the tie tight at the nape of my neck. This allowed me to adjust the mask under my glasses and get a secure fit. The sides of the mask should gather up a little.
Hubby’s been wearing the mask with the elastic bands but had some issues around his glasses. Perhaps people with glasses will prefer the ties to get a closer fit with less slippage.
Washing.
For our first mask, my daughter pre-washed the fabric on warm as is normal for pre-washing. She wore her mask, then washed it on hot water dried it on hot. The fabric shrunk slightly causing the mask to fit differently. We’re pre-washing on hot now.
Alternatives
My daughter and I are also making covers for N-95 masks using the same pattern with two layers of cotton fabric without the polypropylene (Pp) filter.
I’ve considered making surgical style masks to give away. I may decide to put some Pe in there just because I like the moisture control. As I mentioned last week, moisture is a huge problem in the two layer surgical style cloth mask.
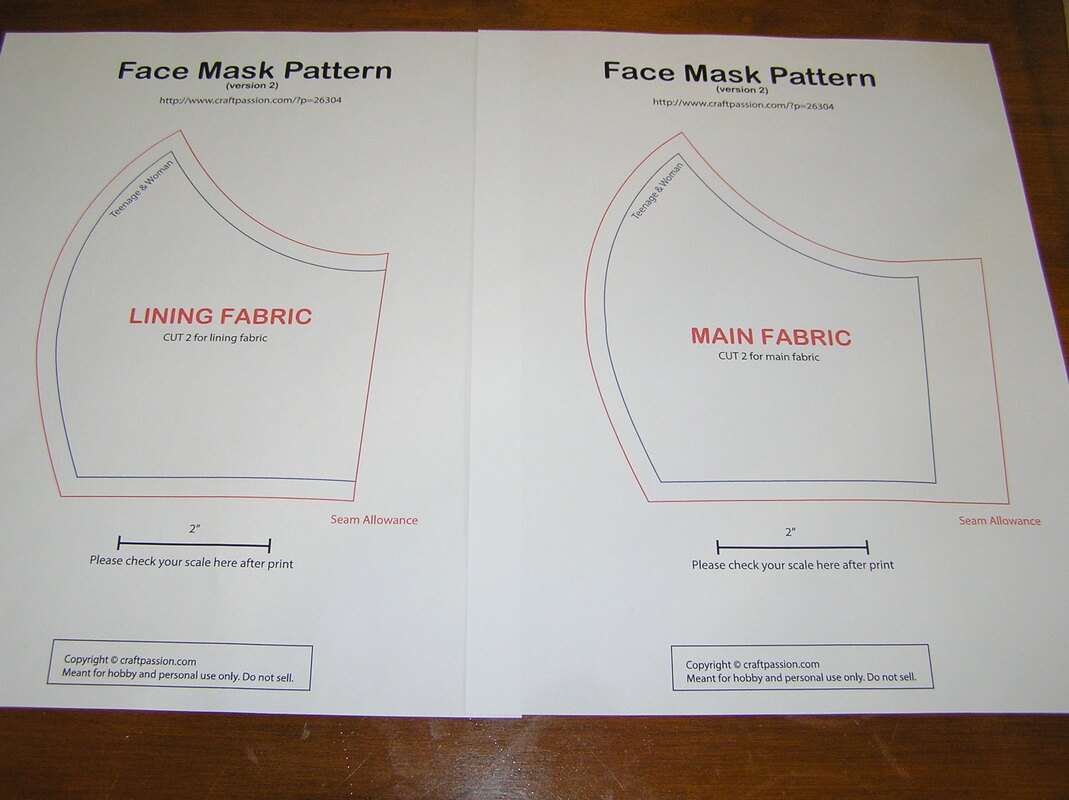
The pattern we used with link to the original at the top of the page. Link: http://www.craftpassion.com/?p=26304
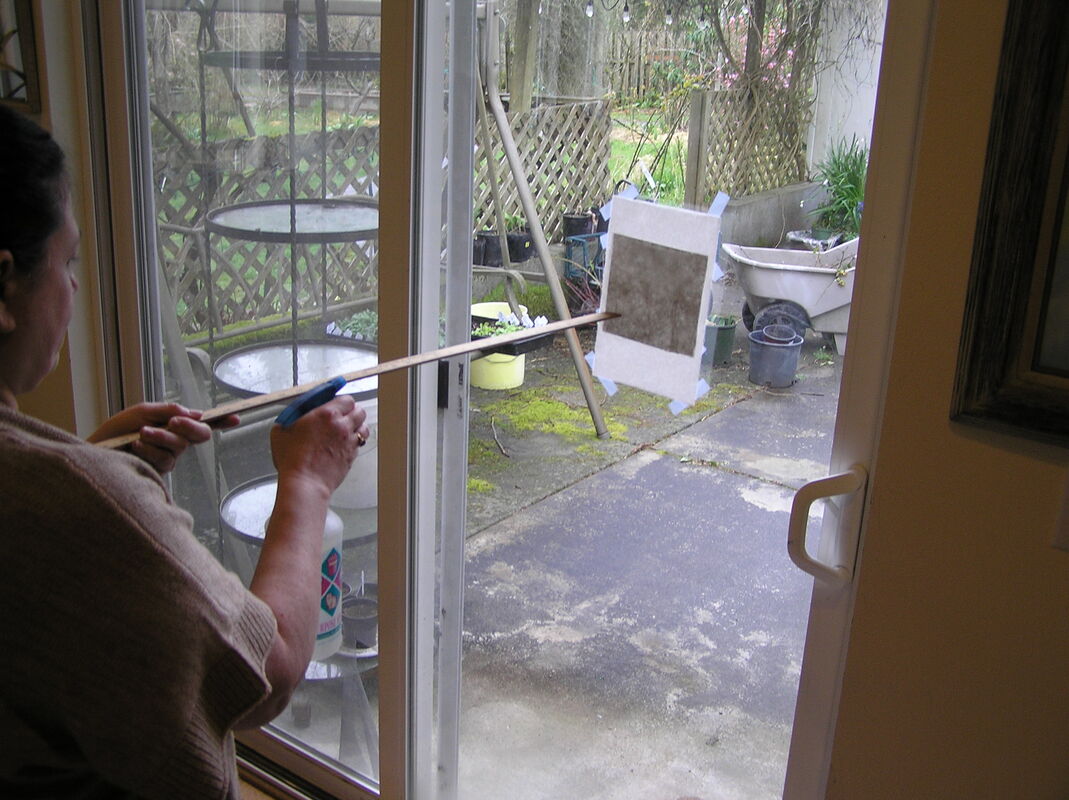
For testing we sprayed our samples from one meter and from .66 meter (2 feet_, but measuring in meters is more sciency.
My daughter in mask with over-the-ear elastic bands. This style moves around more than the once with ties, but is easier to put on and take off. Note: 1/4" elastic is scarce, so we cut some 5/8" down the middle. Also, I posted a bad hair picture of me, so she gets one too.
 RSS Feed